
how to prep your logo for custom embroidery.
Getting a great custom patch starts with good artwork. but embroidered patches are very different from printing a picture on paper. if your logo has too many tiny details, the sewing machine will turn it into a messy blob of thread. this guide will show you exactly how to clean up your logo so it looks perfect when it is sewn.
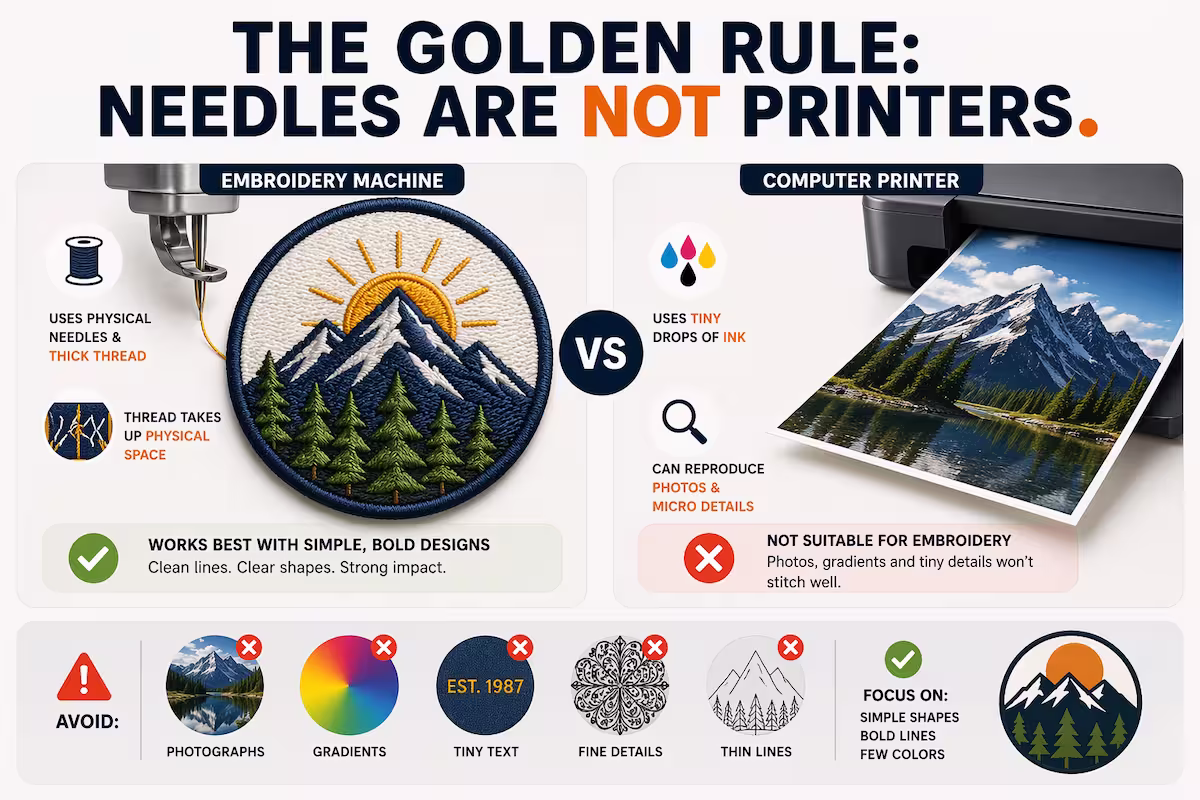
the golden rule: needles are not printers.
before you change your design, you need to understand one basic rule: needles are not printers. a computer printer uses tiny drops of ink to make a picture. an embroidery machine uses physical steel needles and thick thread. thread takes up physical space. because of this, you cannot sew a photograph, and you cannot sew microscopic details. to get a clean patch, you have to keep your design simple.
step 1: remove gradients and drop shadows.
a gradient is when one color slowly fades into another color. you can easily do this on a computer screen, but you cannot fade thread. a spool of thread only comes in one solid color. if your logo has colors that fade, or if it has drop shadows behind the letters, you need to remove them. change all of your fading colors and shadows into solid, flat colors.
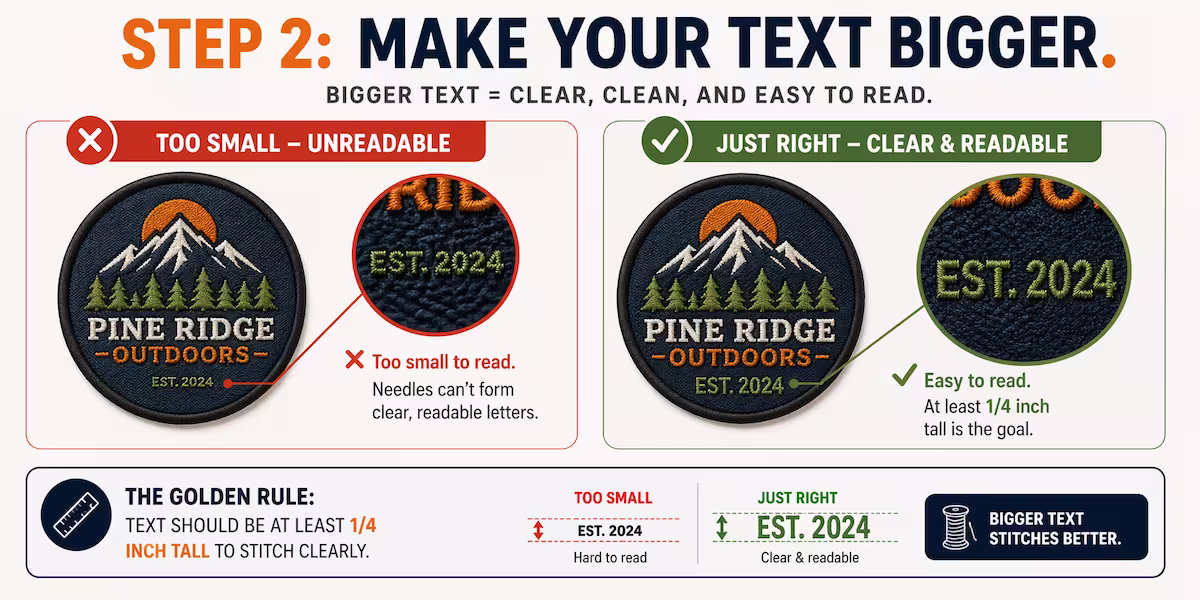
step 2: make your text bigger.
text is the hardest part of embroidery. if your text is too small, the needle will just punch a hole in the fabric and leave a messy knot of thread that nobody can read. as a general rule, letters need to be at least one-quarter of an inch tall to be readable in thread. if your logo has tiny legal text, a long slogan, or a small website address, you need to delete it, make it much bigger, or choose custom woven patches instead.
step 3: delete tiny lines and extra details.
clutter is the enemy of embroidery. if you have too many thin lines close together, the threads will overlap and turn into a messy bird’s nest. a good trick is to zoom out on your logo on your computer screen until it is the size of a patch. if a detail is hard to see when you zoom out, delete it. bold, clean shapes always look the best when sewn with thread.
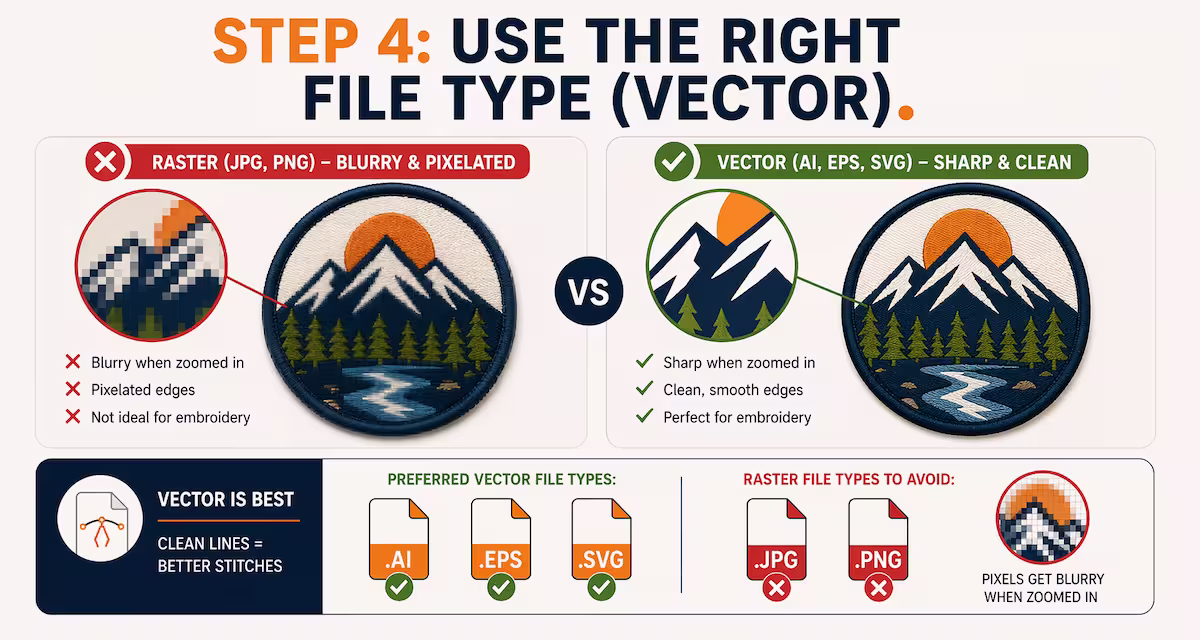
step 4: use the right file type (vector).
when you save your logo, the file type matters. a regular picture, like a .jpg or .png, gets blurry and pixelated when you zoom in. a vector file, like an .ai, .eps, or .svg, is made of clean, mathematical lines. a vector file never gets blurry, no matter how big you make it. this gives us the cleanest lines to work with. always send the vector file if you have it.
frequently asked questions (faq).
what if i only have a blurry picture of my logo?
that is completely fine. if you only have a .jpg or a picture saved on your phone, send it to us. our team can redraw your picture into a clean vector file so it is ready for the machines.
how many colors can i use in my embroidery?
most commercial sewing machines can handle up to 9 or 12 different thread colors at the exact same time. however, the best-looking patches usually stick to 3 or 4 bold colors. keeping the colors simple makes the patch look much cleaner.
what does “digitizing” mean?
digitizing is the process of taking your picture and turning it into a map for the machines. a sewing machine cannot read a .jpg file. our digitizers use special software to map out exactly where the needle needs to go, step by step, to recreate your logo in thread.